Since GarageBand is not natively available for Windows, it cannot be directly installed or uninstalled from a Windows PC. However, if you’ve been using GarageBand through a virtual machine or a similar workaround, here are the steps to uninstall it from your setup:
Uninstall GarageBand from a macOS Virtual Machine
- Open the Virtual Machine: Start your virtual machine software (e.g., VMware, VirtualBox) and run your macOS virtual machine.
- Remove GarageBand from macOS:
- Using Finder:
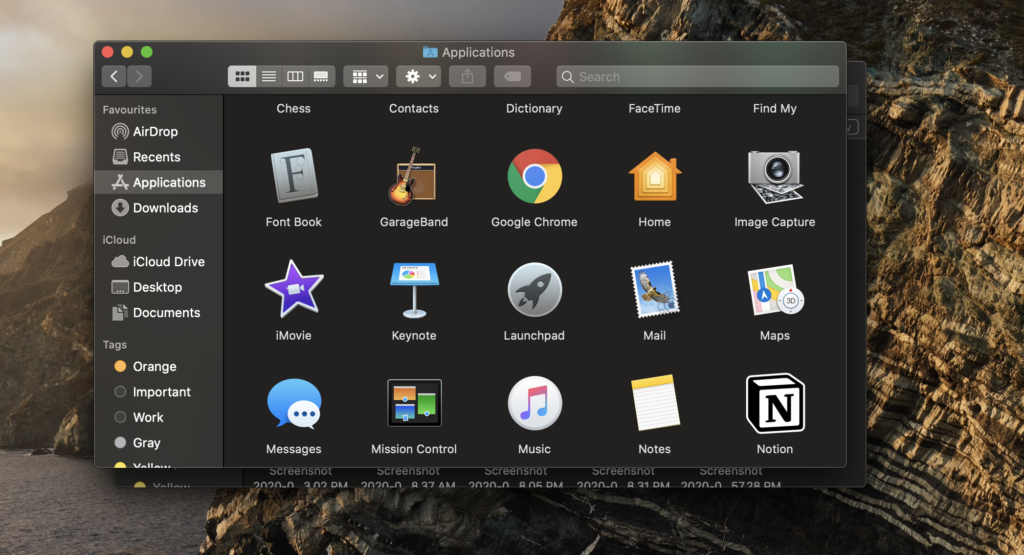
- Open Finder.
- Go to the “Applications” folder.
- Locate GarageBand.
- Drag the GarageBand icon to the Trash, or right-click and select “Move to Trash.”
- Using Terminal (Optional):
- Open Terminal.
- Type the following command and press Enter:
sudo rm -rf /Applications/GarageBand.app - Enter your macOS admin password when prompted.
- Empty the Trash: Right-click the Trash icon in the Dock and select “Empty Trash” to completely remove GarageBand from the virtual machine.
- Optional – Uninstall Virtual Machine Software:
- If you no longer need the virtual machine software itself, you can uninstall it from your Windows PC like any other application:
- Open the “Control Panel.”
- Go to “Programs” > “Programs and Features.”
- Locate your virtual machine software (e.g., VMware, VirtualBox) in the list.
- Click on it and select “Uninstall.”
Uninstall GarageBand from macOS Cloud Services
If you were using a macOS cloud service to access GarageBand, simply discontinue your subscription or access to that service. You generally do not need to perform any uninstallation steps on your local Windows PC.
Removing Virtual Machine Files from Windows
- Delete Virtual Machine Files:
- Navigate to the directory where your virtual machine files are stored.
- Delete the files associated with the macOS virtual machine.
- Remove Additional Files:
- Check for any related configuration files or saved states and delete them as well.
Alternative: Uninstalling GarageBand Alternatives on Windows
If you have installed alternative DAWs like LMMS, FL Studio, or Ableton Live on your Windows PC and want to uninstall them, follow these steps:
- Open Control Panel: Press
Win + R, typecontrol, and press Enter to open the Control Panel. - Go to Programs and Features: Click on “Programs” and then “Programs and Features.”
- Find the Program: Locate the DAW you want to uninstall (e.g., LMMS, FL Studio, Ableton Live) in the list of installed programs.
- Uninstall the Program:
- Select the program.
- Click “Uninstall” and follow the on-screen instructions to remove the software.
By following these steps, you can effectively remove GarageBand from your macOS virtual machine setup or any alternative DAWs from your Windows PC.
